As an Amazon Associate, we earn from qualifying purchases. Some links on this site are affiliate links at no extra cost to you. Our recommendations are based on thorough research and editorial judgment.

How To Window Repair Kits?
To effectively use windshield repair kits, we should focus on small chips or cracks up to 1.25 inches. Key components include resin, applicators, curing strips, and a razor blade for excess removal. The process involves clean application, proper UV curing, and monitoring for any new damage. It’s important to recognize limitations—DIY kits handle minor repairs more effectively than extensive or deep damage. For detailed methods and ideal maintenance tips, further guidance is available.
Key Takeaways
- Identify the type of damage: Choose a kit suitable for chips or cracks under 6 inches for effective results.
- Follow the instruction sheet carefully: Proper cleaning and application processes are essential for effective repairs.
- Use high-quality resin: Select kits with professional-grade resin for better strength and repair integrity.
- Ensure proper curing: Maintain a clean, moisture-free environment and use UV light for optimal curing results.
- Perform regular maintenance: Clean with non-abrasive cleaners and inspect for new damage to extend the lifespan of your repair.
Understanding Windshield Repair Kits
You may be interested


Many car owners may encounter windshield damage at some point, and understanding windshield repair kits can simplify the process. While these kits can address minor issues, there are common misconceptions about their effectiveness. Most are designed for small chips or cracks, typically under 1.25 inches, meaning larger damages may require professional help.
It’s important to note that repair kit alternatives, such as super glue, can compromise safety and effectiveness. The outcome often depends on conditions like temperature and humidity. Accordingly, while DIY kits can reduce visibility and prevent spread, they may not fully restore windshield integrity. If you’re uncertain, consulting a professional remains the best option for extensive damage or complications in repairs. Moreover, it is crucial to follow safety guidelines to ensure proper installation and minimize hazards during the repair process.
Key Components of a Repair Kit

A typical windshield repair kit contains five essential components, each playing a critical role in the repair process.
Resin
This fills chips and cracks, preventing damage spread. It comes in a syringe for precise application and often cures to exceed the glass’s original strength, sometimes stronger.
Applicator Designs
The specialized tools inject the resin, featuring suction cups for stabilization and controlled flow to guarantee effective bonding.
Curing Strips
These transparent strips keep resin contained, spreading it evenly while allowing for UV curing.
Razor Blade
Used post-curing, this helps scrape excess resin for a smooth finish.
Instruction Sheet
Offering step-by-step guidance, it outlines cleaning and application processes for best results. Each component is crucial for a successful repair. Additionally, proper application techniques significantly influence the overall repair effectiveness.
Types of Damage Repairable With Kits

Understanding the key components of a repair kit sets the stage for recognizing the different types of windshield damage that can be effectively addressed.
Surface Pits
These small, pinhead-sized chips can be repaired with resin and UV curing, requiring additional sealing for durability.
Bullseye Breaks
Circular breaks from road debris are larger than surface pits and can be effectively repaired to maintain windshield integrity.
Star Breaks
With crack patterns radiating from the center, these require resin injection to prevent further damage and are often repairable.
Combination Breaks
This type mixes various patterns and can be partially repaired, though larger breaks may need replacement.
Linear Cracks
Extending several inches, these cracks often require multiple injections, but repairs become less effective over 6 inches. Additionally, assessing the glass type selection is crucial for ensuring that the repair is compatible with the windshield material.
Effectiveness of Windshield Repairs

Repairing a windshield can be a sound investment, particularly when minor damage occurs. The effectiveness of windshield repairs hinges on several factors, including epoxy selection and repair frequency. Professional-grade resins typically restore structural integrity, often resulting in stronger repairs than new glass. In contrast, DIY kits may offer temporary fixes, and improper sealing can worsen cracks over time.
For ideal results, we should respect size limits: chips under a quarter and cracks shorter than 3 inches yield better durability. Professional repairs, performed in controlled environments, minimize contamination rates, contributing to longer-lasting fixes. Ultimately, while DIY kits are convenient, they often lack the effectiveness of professional services, especially for repairs on edge cracks or in the driver’s line of sight. Additionally, using high-quality adhesives ensures strong adhesive performance, which is crucial in maintaining the integrity of the repair.
Tools Needed for Successful Repairs

To achieve successful windshield repairs, having the right tools at hand is essential. We recommend a well-equipped repair kit that includes:
- Resin: A specialized polymer for filling cracks.
- Injector: For precise resin application into damage.
- Curing strips: To guarantee even resin curing.
- Razor blade: For scraping excess resin post-curing.
- Cleaning tools: To prepare the damaged area.
For the best results, consider equipment upgrades such as a vacuum pump to enhance resin penetration, and high-performance UV-curable resins for durability. Additionally, training materials can guide best practices, guaranteeing we’re equipped with knowledge for effective repairs. By streamlining our process and utilizing the correct tools, we can assure a lasting and professional repair each time. Choosing energy-efficient windows helps reduce heating and cooling costs, making your upgrades more cost-effective in the long run.
Step-by-Step Repair Process
Step 1: Remove Old Glass****
We start by taping off broken glass to contain shards. Next, we use a putty knife to carefully remove glazing beads and score the edges of the glass.
Step 2: Prepare the Frame****
Next, we clean the frame channel, removing caulk or sealant. Any wood damage should be filled and smoothed.
Step 3: Reglazing****
Using glazing putty, we create a secure bed for the new glass. We then place the glass firmly in position.
Step 4: Finishing Touches****
After allowing adequate curing time, we remove excess putty and clean the glass. Regular maintenance guarantees peak performance, utilizing effective frame protection methods and ensuring window screen replacements fit properly to maintain the integrity of your home.
Preparing the Damaged Area
Before we plunge into the repair process, it’s essential that we properly prepare the damaged area to guarantee a successful outcome. First, we’ll employ effective cleaning techniques. Using a quality glass cleaner or isopropyl alcohol applied to a lint-free cloth, we’ll clean the windshield around the crack. It’s vital we avoid spraying directly on the glass.
Next, we’ll remove loose glass particles using a fine pin, being careful not to widen the crack. Then, we’ll mark the repair area with tape, helping us keep track of the damage while isolating it from the surroundings.
Finally, let’s not forget our safety precautions: wearing gloves and safety glasses, ensuring proper ventilation, and keeping our workspace tidy.
Applying the Resin
After we’ve thoroughly prepared the damaged area, the next step involves applying the repair resin. During resin selection, it’s vital to choose a product specifically formulated for windshield repairs, guaranteeing strong bonding and UV resistance.
We’ll start by removing the protective cap from the resin tube and preparing our applicator according to kit instructions.
Next, we’ll place the adhesive disc and pedestal firmly on the windshield over the crack to create an airtight seal. By slowly injecting the resin into the crack, we’ll apply steady pressure to avoid overflow.
It’s essential to monitor the resin flow, certifying full crack penetration. Once filled, we should include extra drops along the crack to guarantee adequate overfill for effective results.
Curing the Resin: Techniques and Tips
To guarantee a successful repair, proper curing of the resin is crucial. We must consider the curing environment; ensuring it’s free from moisture and dirt is essential for effective resin setting. Uniform UV light, ideally around 365 nanometers, aids in achieving a solid bond.
Here are some techniques for effective resin penetration:
- Curing Tabs: Use rigid curing tabs for a flat seal, promoting even resin distribution.
- Overfilling: Apply resin every two inches beneath tabs, enhancing crack saturation.
- Pressure Application: Maintain slight pressure during curing to assist resin deep into cracks.
Using UV curing meters can monitor intensity, ensuring perfect adhesion while preventing tension cracks. Following these methods will lead to durable, clear repairs, making all the difference.
Finishing Touches: Removing Excess Resin
Removing excess resin from a windshield repair is a critical step that enhances the final appearance and integrity of the repair. To achieve this, we can use advanced scraping techniques.
First, we hold a razor blade at a 90-degree angle. We gently scrape the resin from side to side, ensuring smoothness and control. Tightening our grip minimizes any blade flex.
Timing is key; we wait until the resin has sufficiently cured to avoid smearing. Excess resin should be removed immediately to prevent a hardened film.
Lastly, cleaning our tools with denatured alcohol helps maintain resin management. Regularly changing the blades and practicing on less critical spaces allows us to improve our technique and speed.
Maintenance After Repair
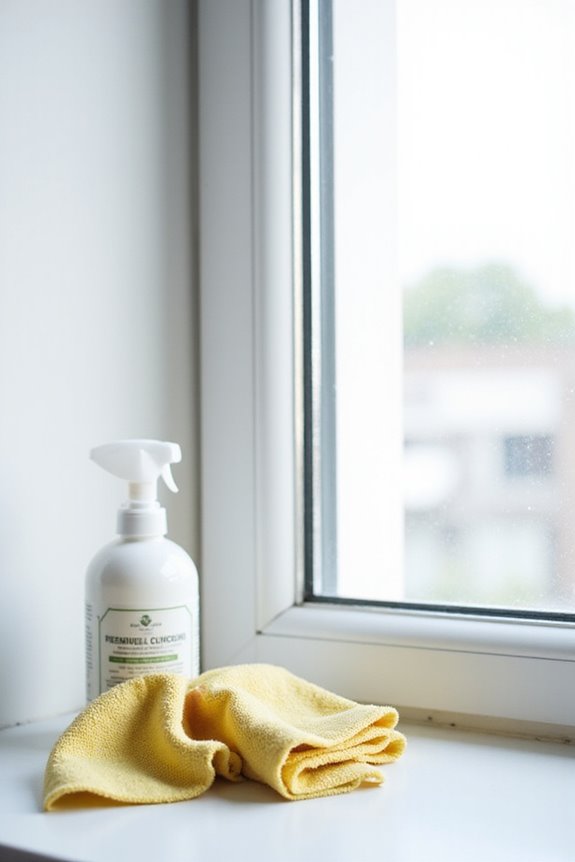
Maintaining our windows in ideal condition post-repair requires a consistent maintenance routine. By employing proper cleaning techniques, we can protect our repairs. Use mild, non-abrasive cleaners for glass surfaces and a soft cloth to clean frames and sills.
Regular inspection schedules help us catch potential issues. It’s crucial to check for new cracks, seals, and hardware conditions. Monitoring energy efficiency also plays a role; we should be vigilant about drafts or sudden increases in heating and cooling bills.
Lastly, lubricating moving parts helps maintain functionality. After applying light household oil or silicone spray, we should operate the windows to distribute the lubricant evenly. This holistic approach guarantees our windows stay in top shape long after repairs are made.
Limitations of DIY Repairs
While DIY repairs can be appealing for minor window damage, they often come with significant limitations that can undermine their effectiveness.
Repair Effectiveness
DIY kits mainly target small, shallow chips like star shapes but fall short for spider web cracks or edge damage. Inadequate bonding can lead to crack expansion, requiring costly replacements later.
Safety Risks
Improper application can weaken the windshield, increasing the likelihood of shattering during stress. Uneven resin distribution might also obscure visibility, heightening dangers while driving.
Quality Concerns
DIY resin quality varies, often insufficient compared to professional-grade materials. Low-quality components result in short-term fixes that don’t hold up against environmental stresses.
Ultimately, these limitations make DIY repairs a risky choice that can lead to greater expenses and compromised safety.
Indicators for Professional Help
How can we determine when it’s time to call in a professional for window repairs? Recognizing visible and structural damage is crucial. If we see cracked glass, warped frames, or water leaks, we should seek a professional window assessment immediately.
Operational and functional issues, like difficulty in opening windows or persistent drafts, indicate potential misalignment or seal failure, necessitating an expert’s intervention.
Signs of thermal and seal failure, such as condensation between panes or increased energy bills, warrant a structural integrity evaluation to guarantee safety and efficiency.
Finally, urgent situations, like broken glass or compromised locks, require prompt action to avoid further complications. These indicators help us understand when professional expertise is important for effective repairs.
Choosing the Right Repair Kit
When selecting a window repair kit, we need to assess several factors to guarantee it meets our needs. Firstly, we should identify the repair kit types suited for our specific damage, such as chips or cracks under 6 inches.
Next, we must evaluate the resin quality. High-grade resin, like that from the Ultra Bond brand, restores nearly 100% glass strength and fills gaps effectively, preventing air bubbles.
Additionally, it’s wise to take into account the kit’s components. Look for one that includes necessary tools, detailed instructions, and efficient resin usage, minimizing waste.
Lastly, ease of use is vital; kits that offer no-mixing options and rapid cure times of 2 to 20 minutes streamline the repair process for us.
Regular Inspection for Proactive Maintenance
Regular inspections are essential for maintaining the integrity and functionality of our windows, ensuring a longer lifespan and energy efficiency. By setting a maintenance schedule for regular checks, we can catch potential issues early.
Visual and Structural Inspection
We should examine window panes for cracks or moisture signs, which can affect insulation. The frames and seals also need assessment for brittleness or damage.
Operational Functionality Testing
Testing window operation confirms ease of use and security.
Seal and Weatherproofing Assessment
Inspect all seals and weather-stripping for cracks, and replace any failing glazing putty.
Regular Cleaning
To maintain clarity, we should clean glass surfaces and window tracks routinely. Scheduling these inspections annually or semi-annually promotes overall health, ensuring that problems don’t escalate into costly repairs.
Frequently Asked Questions
Can I Use a Windshield Repair Kit on Back Windows?
We can’t use a windshield repair kit on back windows. Instead, let’s explore rear window kits specifically designed for tempered glass. They address unique needs, ensuring safer, more effective repairs without risking further damage.
How Long Does a Typical Repair Take?
They say, “A stitch in time saves nine.” For us, typical repair time ranges from 30 to 60 minutes, depending on damage duration. Let’s work together to guarantee our windows regain their shine!
Are There Specific Brands Recommended for DIY Repairs?
We recommend brands like Rain-X, Permatex, and Blue-Star for DIY repairs. Their user-friendly tools and detailed instructions make fixing chips and cracks easier than ever, so we can tackle windshield damage together confidently!
Will Repairing My Windshield Affect My Insurance Rates?
Like a stormy sky, our windshield repair choices can cloud our insurance premium impact. Understanding claims process nuances is essential, as even small repairs might affect rates—but often, maintaining that claim-free streak is worth it.
Can I Reapply Resin if the Crack Spreads After Repair?
We shouldn’t reapply resin if the crack spreads after initial application. It’s tricky; proper adhesion may not happen. Instead, let’s consider professional help for a safe and effective solution, ensuring our safety and clarity on the road.