As an Amazon Associate, we earn from qualifying purchases. Some links on this site are affiliate links at no extra cost to you. Our recommendations are based on thorough research and editorial judgment.

What Is Diy Window Replacement?
DIY window replacement is the process of homeowners removing old windows and installing new ones themselves. It involves two main methods: insert installations, which are quicker and simpler, and full-frame replacements, which require more extensive work. Key tools include safety gear, measuring tape, and a pry bar. The process demands careful preparation, like cleaning the opening and applying flashing tape for waterproofing. Understanding this can help you assess if you’re ready to begin your own project.
Key Takeaways
- DIY window replacement involves homeowners removing old windows and installing new ones without professional help, saving on labor costs.
- The process varies in complexity, primarily using insert (pocket) installations or full-frame replacements for different needs.
- Proper preparation is essential, requiring safety gear and tools like measuring tapes, utility knives, and pry bars.
- Benefits include cost savings, improved energy efficiency, higher home resale value, and enhanced aesthetics.
- Adhering to modern building codes ensures that new windows perform optimally in energy conservation.
Definition of DIY Window Replacement
You may be interested


When we talk about DIY window replacement, we’re referring to the process where homeowners take on the task of removing old windows and installing new ones themselves. This approach can vary in complexity based on window types and installation methods, typically involving either insert (pocket) installations or full-frame replacements.
Insert (Pocket) Installation
- Easier and faster, retaining the existing frame.
- Suitable for window-to-window replacements of the same size.
Full-Frame Installation
- Requires complete frame removal and is more time-consuming.
- Ideal for deteriorated frames or changing window dimensions.
Additionally, ensuring proper installation techniques is crucial for maintaining energy efficiency and maximizing the longevity of your new windows.
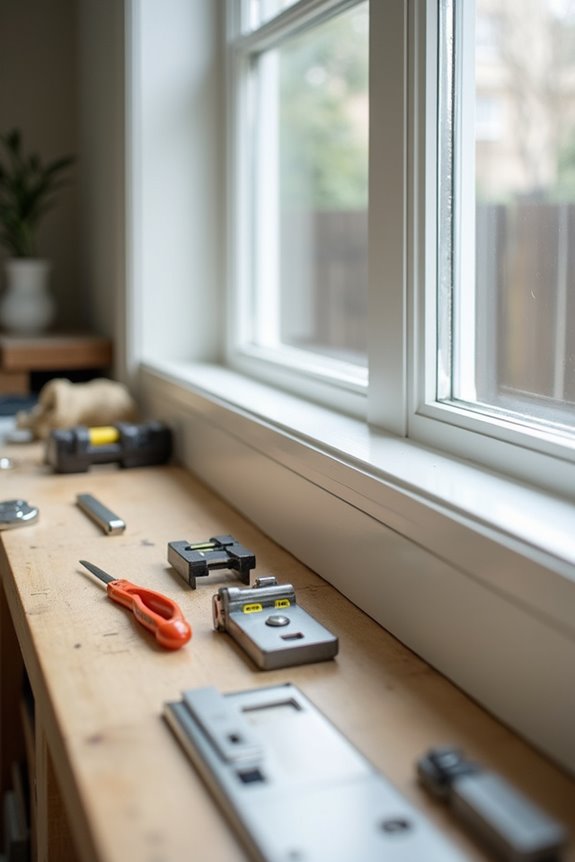
Preparation and Tools Needed

Successful DIY window replacement hinges on thorough preparation and the right tools. Before we embark on the project, let’s gather essential safety equipment to protect ourselves. We’ll need:
- Safety glasses to shield our eyes from debris
- Work gloves to avoid cuts and splinters
- Hearing protection for power tool use
- A dust mask to prevent inhaling particulates
- Proper footwear with good grip for stability
Next, we’ll need reliable measuring tools. A measuring tape is critical for accurate window opening dimensions. We’ll also use a two-foot level to guarantee the window is installed plumb and square. A utility knife and a pry bar will assist in removing old window frames efficiently. Additionally, ensure that your new windows comply with modern building codes for optimal energy performance. With these tools at hand, we’re prepared for a successful installation.
Steps for Removing the Old Window

To effectively remove an old window, we must prioritize safety and preparation before getting started. First, let’s check if our home was built before 1978. If it was, we need to handle lead-based paint cautiously. Wearing NIOSH-certified respirators, safety goggles, and gloves, we can clear the workspace of furniture and cover the floors with heavy-duty plastic sheeting for debris management.
Next, we’ll score the paint and caulk around the frame with a utility knife and use a pry bar to detach window stops. After raising the lower sash, we’ll fold the jamb liner and disengage the pins to extract it. Finally, we’ll clean the rough opening, ensuring there are no protruding nails or debris, while maintaining window safety throughout the process. It’s also important to have the right tools ready, including suction cups for heavy lifting, to ensure a more efficient and safer removal process.
Installation Process of New Windows

Applying Flashing Tape
First, we’ll apply flashing tape along the sill, extending up the vertical leg of the stool to create a waterproof barrier.
Leveling the Sill
Next, we check the sill for levelness, using shims as necessary to secure a flat surface.
Dry-Fitting the Window
We’ll dry-fit the new window, ensuring a uniform gap and confirming it fits squarely against the stops.
Caulking and Installation
Before securing, we lay down a bead of silicone caulk on critical contact points. Finally, we insert the window, shim it, and drive screws to secure it firmly, completing the installation process with weatherproofing measures. Additionally, proper installation is crucial to prevent potential leaks or issues later on.
Timing and Skill Level Requirements
When starting on a DIY window replacement project, it’s essential to understand the timing and skill level involved. Time management is vital; a full-frame window replacement typically takes 4 to 6 hours, while insert replacements require under an hour. Larger structures may take 2 to 6 hours due to complexity.
Next, we must assess our skill level. Full-frame replacements need moderate to advanced carpentry skills, such as removing frames and making structural repairs. In contrast, insert replacements suit beginner to intermediate DIYers, requiring basic skills like measuring and caulking.
To guarantee a smooth project, plan for added preparation time, potential issues like damaged wood, and variations due to weather conditions, all of which influence our project duration. Additionally, understanding the energy efficiency factors for windows is crucial to make informed decisions that enhance your home’s insulation.
Benefits of DIY Window Replacement
Exploring the benefits of DIY window replacement reveals both financial and practical advantages that can enhance our home. One significant aspect is cost savings; we can save around 15% by eliminating professional labor costs. New windows not only improve energy efficiency, potentially reducing our monthly energy bills by $10 to $50, but they also contribute to a higher home resale value, recouping 60-73% of replacement costs.
Furthermore, modern windows help decrease heating and cooling expenses, as they account for up to 35% of home energy loss. Features like low-e coatings and multi-pane glass enhance insulation performance, making our living spaces more comfortable. By taking on this project ourselves, we can achieve long-term savings while improving our home’s aesthetic and efficiency. Additionally, using window seal kits offers a cost-effective solution for further enhancing insulation and reducing drafts.
Considerations and Potential Risks
While the prospect of DIY window replacement can be appealing, we must carefully weigh several considerations and potential risks associated with the process.
Safety Hazards
Handling heavy, sharp-edged materials can lead to cuts and injuries. Additionally, without proper training and equipment, working at heights raises fall hazards.
Cost Risks
Improper installation may result in air or water infiltration, leading to higher energy bills and costly repairs. Unexpected structural issues, such as rot, can greatly increase project complexity and expenses.
Measurement Errors
Inaccurate sizing could create gaps, affecting energy efficiency and aesthetics. Professionals guarantee precise fit and seal, which is challenging for DIYers.
Frequently Asked Questions
What Types of Windows Can Be Replaced DIY?
Did you know 60% of DIYers prefer vinyl windows due to their ease? We can tackle single hung and even wooden windows together, creating a beautiful, functional space with our shared skills and creativity. Let’s get started!
Do I Need a Permit for Window Replacement?
Yes, we often need a permit for window replacement, especially if building codes and local regulations change the structure or size. Let’s check with our local building department to guarantee all requirements are met properly.
How Do I Choose Energy-Efficient Windows?
When we choose energy-efficient windows, let’s focus on energy ratings and window materials. Double or triple-pane options with Low-E coatings and durable frames will enhance comfort while saving on our energy bills.
Can I Replace Windows in Winter?
Absolutely, we can replace windows in winter! Embracing winter challenges, we’ll share insulation tips like using protective barriers and scheduling one-at-a-time replacements, ensuring warmth remains during installation. Let’s tackle this together!
What Should I Do With My Old Windows?
We can repurpose old windows into charming decorations or garden frames. If they’re beyond help, let’s recycle the glass together, ensuring we minimize waste and contribute to a more sustainable future for our environment.


