As an Amazon Associate, we earn from qualifying purchases. Some links on this site are affiliate links at no extra cost to you. Our recommendations are based on thorough research and editorial judgment.

Tips For Storm Windows?
When considering storm windows, we should evaluate their energy efficiency, style, and materials. Benefits include a 7.8% reduction in HVAC energy use and enhanced insulation with U-factors improved by up to 63%. Choosing durable materials like extruded aluminum or fiberglass is essential, as they require less maintenance. Accurate measurements guarantee a perfect fit, and regular inspections will help maintain their longevity. If we explore more specific strategies, we’ll find additional ways to maximize their effectiveness.
Key Takeaways
- Choose low-E coated glass for better energy efficiency, reducing heat loss and lowering energy bills by 10% or more.
- Evaluate both interior and exterior storm windows based on your specific needs and desired airflow options.
- Ensure accurate measurements and clean window openings before installation to achieve a solid fit and minimize air leakage.
- Perform routine inspections and maintenance biannually to detect issues early and preserve the longevity of your storm windows.
- Use silicone spray to lubricate window tracks and hinges annually, ensuring smooth operation and preventing wear.
Understanding the Benefits of Storm Windows
You may be interested


When considering energy efficiency in our homes, storm windows offer significant advantages over standard single-pane windows. They can reduce annual HVAC energy use by roughly 7.8%, equating to about 1,000 kWh saved each year in average homes. By installing ENERGY STAR-certified low-E storm windows, we can expect to save around $350 annually on heating and cooling bills. The improved U-factor, measuring heat transfer, can enhance insulation by 47% to 63%. Additionally, storm windows help minimize air infiltration, decreasing drafts and enhancing indoor comfort. With a payback period of around 3 to 13.5 years, they’re a worthwhile investment for both energy efficiency and comfort improvement. Storm windows consequently provide a practical solution that benefits our homes in various climates, as they can be combined with impact-resistant window solutions for added safety during severe weather events.
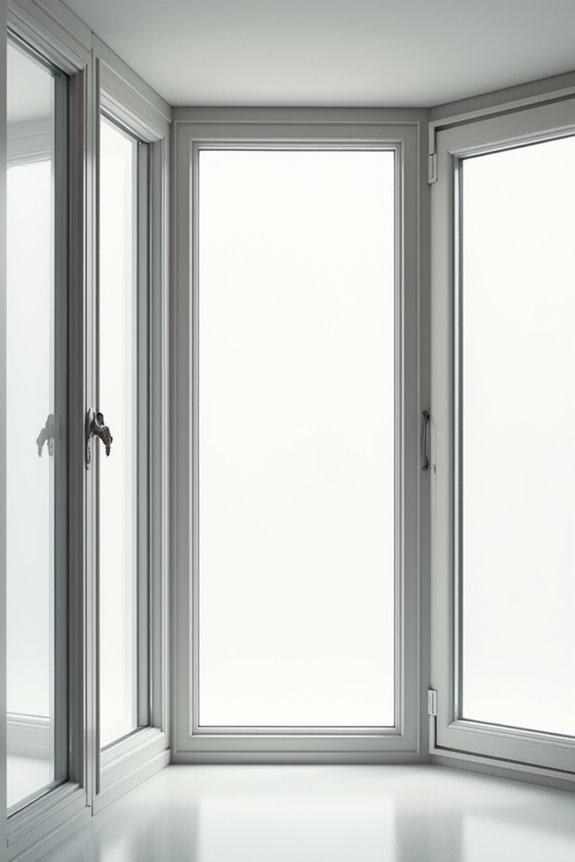
Choosing the Right Type of Storm Windows

When evaluating storm window styles, we should contemplate indoor versus outdoor options. Interior storm windows offer higher window energy efficiency without visible weep holes, while exterior options provide weather protection but can impact curb appeal and installation complexity.
Here are key storm window styles to contemplate:
- Fixed-pane: Affordable, solid panels that don’t open.
- Two-track: Sliding sashes for ventilation and easy cleaning.
- Triple-track: Additional sash for greater airflow options.
Ultimately, our choice should also reflect our home’s specific needs, desired airflow, and budget constraints. By carefully evaluating these factors, we can make an informed decision that enhances our home’s comfort and efficiency. Additionally, typical costs of installation may influence our budget when selecting the right type of storm windows.
Selecting Materials for Durability and Maintenance

While choosing materials for storm windows, we must prioritize durability alongside maintenance requirements. For superior material durability, extruded aluminum and fiberglass stand out. Extruded aluminum’s solid construction allows it to resist hail and storm damage, while fiberglass is lightweight but highly resilient against warping.
It’s important to take into account maintenance costs. Extruded aluminum and fiberglass require minimal upkeep, making them ideal choices for long-term satisfaction. In contrast, roll-formed aluminum frames and wood wrapped structures tend to deteriorate quicker, leading to higher maintenance costs over time.
Composite materials offer a blend of durability and low maintenance, outperforming common vinyl. With these factors in mind, we can guarantee our storm windows withstand the elements with minimal care. Additionally, selecting energy-efficient aluminum casement windows can further enhance your home’s insulation and durability.
Importance of Low-E Coated Glass

Energy efficiency is a primary factor for many homeowners considering storm windows, and Low-E coated glass greatly enhances this aspect. The Low E benefits include reducing heat loss, which can lower energy bills by 10% or more annually. This coating reflects infrared heat, stabilizing indoor temperatures and providing quick payback through energy savings.
In addition to energy savings, Low-E glass offers significant UV protection. It blocks a large portion of harmful ultraviolet rays, preventing fading of furniture and extending the lifespan of interior items. By filtering these rays, Low-E glass also reduces solar heat gain during summer, improving overall comfort. With a durable, invisible coating, we can maintain both aesthetics and performance in our homes for years to come. Furthermore, proper installation and sealing techniques can achieve an air leakage rate below 0.3 cfm/ft², enhancing the window’s energy efficiency.
Measuring Existing Windows for a Perfect Fit

Accurate measurements are essential when preparing for storm window installation. To begin, we’ll measure the window width at three points: the top, middle, and bottom of the frame. Always record the smallest measurement to guarantee a snug fit. For overlap installations, add one inch to this width.
Next, let’s focus on window height. Measure from the top opening to just above the bottom lip, again at three locations: left, middle, and right. Use the smallest height to account for frame variations.
Remember to identify the type of window frame—Eastern or Western—as this influences installation methods and measurements. Taking careful window measurements guarantees that we’ll order the right storm windows for our specific needs and avoid costly fitting errors. Additionally, ensure that you consider energy-efficient windows that can significantly reduce heating and cooling costs over time.
Preparing Your Home for Storm Window Installation
Preparing our home for storm window installation requires a systematic approach to confirm everything is set for a successful fit.
First, we should thoroughly clean the window openings, confirming no dirt or debris remains. Next, we’ll inspect the window frames for any signs of damage and repair any issues to create a solid surface for installation.
We must also apply quality caulk along the window frame’s top and sides, while leaving the bottom sill unsealed for drainage.
Before we begin, let’s verify that all necessary installation tools—like a drill, caulking gun, and putty knife—are on hand. Finally, measuring and recording the window dimensions will confirm our storm windows fit perfectly when it’s time to install. Additionally, ensuring the use of double-pane insulated glass panels will enhance thermal efficiency and reduce heat transfer during storms.
Installation Steps for Exterior Storm Windows
When we decide to install exterior storm windows, it’s crucial to follow a methodical process to guarantee proper fit and functionality.
Fit and Measurement
We should start by measuring the window opening width at three points—top, center, and bottom—using the smallest measurement for ordering. For height, check the right, left, and center as well, ensuring an adequate fit.
Surface Preparation
Clean the frame thoroughly and apply a thick bead of elastomeric or butyl caulk on contact points.
Positioning and Securing
Carefully rest the storm window on the sill, ensuring proper alignment. Predrill pilot holes to avoid damage, secure the window, and check all dimensions for storm window safety.
Installation Steps for Interior Storm Windows
Installing interior storm windows can enhance energy efficiency and comfort in our homes. Here’s a streamlined process for installation.
Measuring and Preparing
- Measure the window opening at various points, using the smallest dimensions.
- Scrape off old paint or debris for a smooth surface.
- Remove any window coverings for easier access.
Frame Assembly
- Cut frame pieces with a mitre saw for precise fits.
- Assemble using mechanical fasteners like pocket hole screws.
- Sand edges for a smooth finish, ensuring airtight seals.
Mounting
- Position the frame inside the opening for a tight fit.
- Attach top mounting strip with screws, ensuring it’s straight.
- Seal gaps with caulk, avoiding the bottom edge for moisture escape.
This process addresses potential installation challenges while maximizing storm window benefits for our homes.
Ensuring Proper Window Fit and Alignment
Ensuring a proper fit and alignment for storm windows is essential to maximizing their effectiveness. To start, we should measure the window width at three points—top, middle, and bottom—and use the smallest measurement for fit accuracy. For height, we’ll measure at multiple points to account for frame irregularities.
Next, we need to check the window’s framing condition. If adjustments are necessary, we can trim the flange gradually, making sure not to remove more than 1/2 inch. Position the storm window, ensuring it’s centered and flush at the top. We’ll perform alignment checks by measuring diagonals; both should be equal for a square fit. Finally, keep a consistent gap around the window to allow for thermal expansion.
Sealing Techniques for Energy Efficiency
To achieve ideal energy efficiency for our storm windows, we must utilize effective sealing techniques that minimize air and moisture infiltration. By selecting the right insulating materials, such as foam, felt, or vinyl weatherstripping, we can fill any irregular gaps around our windows.
For narrow cracks and gaps, applying silicone or polyurethane caulk provides a long-lasting barrier against air leakage, essential for maximum energy performance.
It’s important to remove old weatherstripping before replacing it and to guarantee proper installation for a tight fit. Inspecting and maintaining weatherstripping annually keeps our seals airtight, preventing drafts and enhancing indoor comfort. Together, these sealing techniques will remarkably reduce energy loss and improve our storm windows’ overall effectiveness.
Cost Savings and Energy Efficiency Benefits
While storm windows offer enhanced insulation and energy efficiency, they also provide significant cost savings over time. By installing low-E storm windows, we can save around 10% on heating and cooling bills, translating to about $350 annually. Energy audits indicate that homes could improve HVAC efficiency by up to 21% with low-E storm windows compared to traditional options.
The payback period for these windows typically falls under five years, making them attractive for inclusion in weatherization programs. In colder climates, we often see reductions in HVAC energy usage by approximately 15%. This significant savings-to-investment ratio reinforces the value of storm windows, particularly for those with older, leaky windows, ensuring a comfortable living environment at a lower ongoing cost.
Regular Maintenance Tips for Longevity
Maintaining storm windows is essential for their longevity and performance. We should conduct routine inspections biannually, ideally in spring and fall, to catch any issues early. During these seal inspections, we’ll check for glass cracks, seal gaps, and signs of frame deterioration.
It’s vital to lubricate window tracks, hinges, and locks annually with silicone spray. Additionally, we must guarantee weatherstripping is intact and replace any worn or damaged pieces.
Let’s remember to monitor condensation between panes, as it indicates seal failure. By caring for our storm windows through regular window cleaning and inspections, we can protect our investment, making sure they function effectively for years to come.
Cleaning Techniques for Storm Windows
Effective cleaning of storm windows requires a systematic approach to guarantee clarity and prevent damage. First, we gather our cleaning supplies, including warm water, mild dish soap or white vinegar, microfiber cloths, and a squeegee.
Next, let’s prepare the windows by removing dust and cobwebs from the frames. We should verify window safety by labeling each glass piece during removal and avoiding aggressive scrubbing on thin glass surfaces.
When cleaning, we can use a soft brush or rag to gently wash the glass, applying careful pressure on stubborn spots. After washing, a squeegee helps us remove excess water efficiently. Finally, we always dry the windows thoroughly to avoid fogging, verifying our storm windows remain clear and functional.
Repairing and Replacing Weatherstripping
After ensuring our storm windows are clean and clear, we can turn our attention to the weatherstripping, which is essential for maintaining energy efficiency and preventing drafts. We have several weatherstripping materials to choose from, including foam tape, V-strip, and rubber gaskets. Each type serves different window needs.
To replace it, we should first remove any old weatherstripping carefully. We’ll measure the gaps for precise fitting. If needed, we can create a groove with hand tools for better installation. Firmly press the new weatherstripping into place, avoiding bunching or gaps while ensuring even compression.
Lastly, we should check our work to confirm that all areas are sealed tightly, eliminating any chance of air infiltration.
Seasonal Considerations for Storm Window Use
As the seasons change, it’s essential to understand how we can best use storm windows to enhance energy efficiency and protect our homes. Storm window adaptability allows us to adjust our strategies based on the climate impact of our region.
Winter Preparation
- Clean windows for peak insulation.
- Inspect seals and align sashes properly.
- Remove screens for better sealing.
Spring Maintenance
- Clear allergens and check for winter damage.
- Reinstall screens for ventilation.
Seasonal Removal
- Consider exterior windows for storms, while opting for interior versions in milder climates.
- Guarantee proper installation and removal techniques for longevity.
Frequently Asked Questions
How Do Storm Windows Impact Home Security?
Storm windows? Oh sure, they’re just our home’s tough armor. With strong window materials, they boost security benefits, keeping sneaky intruders at bay and ensuring our cozy space stays safe from both storms and unwanted guests.
Can Storm Windows Be Installed in Rental Properties?
Yes, we can install storm windows in rental properties, but we’ve got to take into account installation factors and rental regulations. Landlord approval is essential, so let’s make sure we follow the rules to keep everyone happy.
Are Storm Windows Effective in Preventing Condensation?
Oh, the drama of condensation! But fear not, ’cause storm windows are our heroes, providing impressive condensation reduction and energy efficiency. Together, we can enjoy a drier, cozier home while battling moisture’s unwanted dance!
What Colors Are Available for Storm Window Frames?
We’ve got a range of storm window colors and frame options for you! From classic white and bronze to sleek black or custom hues, there’s something to match your home’s style perfectly.
Do Storm Windows Require Building Permits for Installation?
Maneuvering through nuanced local regulations, we’ve found that storm windows often don’t need permits for installation, especially when simply added over existing ones. Still, it’s wise to check specific installation requirements in our area before diving in!